Dense Image Data
In this tutorial we will walk through a real-world example of ingesting and reading dense image data in a TileDB array. It is recommended to first read the tutorials on dense arrays and attributes. We built the code example of this tutorial in C++, but by now you are hopefully able to port this to other languages using the TileDB APIs.
Program |
Links |
|
|

Project setup
For this tutorial we will ingest dense image data into a TileDB array and
perform some basic slices and filters on it. We’ll use the widely-available
libpng library for reading
pixel data from PNG files. The tutorial will also assume you’ve already
installed a TileDB release on your system (see the Installation
page for instructions on how to do that) as well as libpng.
To get started, it will be easiest to use the
example CMake project
as a template that we will fill in, including linking the ingestor
program with libpng.
Clone the TileDB repository and copy the examples/cmake_project directory to
where you want to store this project:
$ git clone https://github.com/TileDB-Inc/TileDB.git
$ mkdir ~/tiledb_projects
$ cd TileDB
$ cp -R examples/cmake_project ~/tiledb_projects/png_example
$ cd ~/tiledb_projects/png_example
Adding libpng
First, edit the src/main.cc file and add the new include at the top:
C++
#include <png.h>
// Note: on some macOS platforms with a brew-installed libpng,
// include instead:
// #include <libpng16/png.h>
Next, edit CMakeLists.txt and add the commands to link the executable against libpng:
# Find and link with libpng.
find_package(PNG REQUIRED)
target_link_libraries(ExampleExe "${PNG_LIBRARIES}")
target_include_directories(ExampleExe PRIVATE "${PNG_INCLUDE_DIRS}")
target_compile_definitions(ExampleExe PRIVATE "${PNG_DEFINITIONS}")
Then build the program as follows.
$ mkdir build
$ cd build
$ cmake .. && make
In the remainder of the tutorial, we will be building up src/main.cc, which
will eventually contain our full code example.
Reading and writing PNG data with libpng
First we need to interface with libpng to be able to read/write pixel data
from/to .png files on disk. Add the following two functions at the top
of src/main.cc. The first, read_png(), will read PNG pixel data from
a given path, and normalize it such that there are always values for all
four RGBA components. The second, write_png(), will write pixel data to a
new .png image at the given path.
Click to see: read_png()
C++
/**
 * Reads a .png file at the given path and returns a vector of pointers to
 * the pixel data in each row. The caller must free the row pointers.
 *
 * This is a modified version of: https://gist.github.com/niw/5963798
 * "How to read and write PNG file using libpng"
 * (C) 2002-2010 Guillaume Cottenceau
 * Redistributed under the X11 license.
 */
std::vector<uint8_t*> read_png(
    const std::string& path, unsigned* width, unsigned* height) {
  std::vector<uint8_t*> row_pointers;

  // Get the image info.
  auto fp = fopen(path.c_str(), "rb");
  png_structp png =
      png_create_read_struct(PNG_LIBPNG_VER_STRING, NULL, NULL, NULL);
  png_infop info = png_create_info_struct(png);
  setjmp(png_jmpbuf(png));
  png_init_io(png, fp);
  png_read_info(png, info);

  *width = png_get_image_width(png, info);
  *height = png_get_image_height(png, info);
  uint8_t color_type = png_get_color_type(png, info),
          bit_depth = png_get_bit_depth(png, info);

  // Read any color_type into 8bit depth, RGBA format.
  // See http://www.libpng.org/pub/png/libpng-manual.txt
  if (bit_depth == 16)
    png_set_strip_16(png);

  if (color_type == PNG_COLOR_TYPE_PALETTE)
    png_set_palette_to_rgb(png);

  // PNG_COLOR_TYPE_GRAY_ALPHA is always 8 or 16bit depth.
  if (color_type == PNG_COLOR_TYPE_GRAY && bit_depth < 8)
    png_set_expand_gray_1_2_4_to_8(png);

  if (png_get_valid(png, info, PNG_INFO_tRNS))
    png_set_tRNS_to_alpha(png);

  // These color_type don't have an alpha channel then fill it with 0xff.
  if (color_type == PNG_COLOR_TYPE_RGB || color_type == PNG_COLOR_TYPE_GRAY ||
      color_type == PNG_COLOR_TYPE_PALETTE)
    png_set_filler(png, 0xFF, PNG_FILLER_AFTER);

  if (color_type == PNG_COLOR_TYPE_GRAY ||
      color_type == PNG_COLOR_TYPE_GRAY_ALPHA)
    png_set_gray_to_rgb(png);

  png_read_update_info(png, info);

  // Set up buffers to hold rows of pixel data.
  for (int y = 0; y < *height; y++) {
    auto row = (uint8_t*)(std::malloc(png_get_rowbytes(png, info)));
    row_pointers.push_back(row);
  }

  // Read the pixel data.
  png_read_image(png, row_pointers.data());
  fclose(fp);

  return row_pointers;
}
Click to see: write_png()
C++
/**
 * Writes a .png file at the given path using a vector of pointers to
 * the pixel data in each row. The caller must free the row pointers.
 *
 * This is a modified version of: https://gist.github.com/niw/5963798
 * "How to read and write PNG file using libpng"
 * (C) 2002-2010 Guillaume Cottenceau
 * Redistributed under the X11 license.
 */
void write_png(
    std::vector<uint8_t*>& row_pointers,
    unsigned width,
    unsigned height,
    const std::string& path) {
  FILE* fp = fopen(path.c_str(), "wb");
  if (!fp)
    abort();

  png_structp png =
      png_create_write_struct(PNG_LIBPNG_VER_STRING, NULL, NULL, NULL);
  if (!png)
    abort();

  png_infop info = png_create_info_struct(png);
  if (!info)
    abort();

  if (setjmp(png_jmpbuf(png)))
    abort();

  png_init_io(png, fp);

  // Output is 8bit depth, RGBA format.
  png_set_IHDR(
      png,
      info,
      width,
      height,
      8,
      PNG_COLOR_TYPE_RGBA,
      PNG_INTERLACE_NONE,
      PNG_COMPRESSION_TYPE_DEFAULT,
      PNG_FILTER_TYPE_DEFAULT);
  png_write_info(png, info);

  // To remove the alpha channel for PNG_COLOR_TYPE_RGB format,
  // Use png_set_filler().
  // png_set_filler(png, 0, PNG_FILLER_AFTER);

  png_write_image(png, row_pointers.data());
  png_write_end(png, NULL);

  fclose(fp);
}
The array schema
Before ingesting data, we need to design an array schema to hold the data. In this case, the image data is two-dimensional and dense, so we will ingest the data into a 2D dense array.
PNG pixel data typically has four component values for each pixel in the image: red, green, blue, and alpha (RGBA). We have several choices on how to store this data.
One possible approach is to have each cell in the array (corresponding
to each pixel in the image) hold a single uint32_t with the
RGBA value. This would correspond to an array schema with a single
attribute named rgba of type uint32_t, e.g.:
C++
ArraySchema schema(ctx, TILEDB_DENSE);
schema.add_attribute(Attribute::create<uint32_t>(ctx, "rgba"));
Because the RGBA value is fundamentally made of four components, we can also store
the components separately, where each cell has a separate red, green, blue and alpha
value. This would correspond to an array schema with four attributes:
red, green, blue, and alpha, all of type uint8_t, e.g.:
C++
ArraySchema schema(ctx, TILEDB_DENSE);
schema.set_order({{TILEDB_ROW_MAJOR, TILEDB_ROW_MAJOR}}).set_domain(domain);
schema.add_attribute(Attribute::create<uint8_t>(ctx, "red"))
      .add_attribute(Attribute::create<uint8_t>(ctx, "green"))
      .add_attribute(Attribute::create<uint8_t>(ctx, "blue"))
      .add_attribute(Attribute::create<uint8_t>(ctx, "alpha"));
The choice of array schema depends on the type of read queries that will be issued to the array, and whether separate access to the RGBA components will be a common task. For the rest of this tutorial, we will use the second schema, with four attributes.
Once we have decided on a schema for the array to hold our data, we can write the function to define the array:
C++
using namespace tiledb;

/**
 * Create a TileDB array suitable for storing pixel data.
 *
 * @param width Number of columns in array domain
 * @param height Number of rows in array domain
 * @param array_path Path to array to create
 */
void create_array(
    unsigned width, unsigned height, const std::string& array_path) {
  Context ctx;
  Domain domain(ctx);
  domain
      .add_dimension(
          Dimension::create<unsigned>(ctx, "y", {{0, height - 1}}, 100))
      .add_dimension(
          Dimension::create<unsigned>(ctx, "x", {{0, width - 1}}, 100));

  ArraySchema schema(ctx, TILEDB_DENSE);
  schema.set_order({{TILEDB_ROW_MAJOR, TILEDB_ROW_MAJOR}}).set_domain(domain);
  schema.add_attribute(Attribute::create<uint8_t>(ctx, "red"))
      .add_attribute(Attribute::create<uint8_t>(ctx, "green"))
      .add_attribute(Attribute::create<uint8_t>(ctx, "blue"))
      .add_attribute(Attribute::create<uint8_t>(ctx, "alpha"));

  // Create the (empty) array on disk.
  Array::create(array_path, schema);
}
The above array schema specifies that the domain of the array will be
[0, height-1], [0, width-1] in the y and x dimensions, respectively. Notice that
y corresponds to the height/rows and x to the width/columns of the array.
Conceptually, this corresponds to a traditional row-major ordering of pixel data, which
will make it easier to interface with libpng (which returns pixel data already
in row-major order).
We’ve chosen a relatively small tile extent of 100x100; for very large (e.g. gigapixel)
images it would make sense to increase this to 1000x1000 or even higher.
Ingesting PNG data
We will write a function that uses the read_png() function from earlier to
retrieve pixel data from an image on disk, splits the pixel data into four
attribute buffers (one per color channel), and issues a write query to TileDB:
C++
/**
 * Ingest the pixel data from the given .png image into a TileDB array.
 *
 * @param input_png Path of .png image to ingest.
 * @param array_path Path of array to create.
 */
void ingest_png(const std::string& input_png, const std::string& array_path) {
  // Read the png file into memory
  unsigned width, height;
  std::vector<uint8_t*> row_pointers = read_png(input_png, &width, &height);

  // Create the empty array.
  create_array(width, height, array_path);

  // Unpack the row-major pixel data into four attribute buffers.
  std::vector<uint8_t> red, green, blue, alpha;
  for (unsigned y = 0; y < height; y++) {
    auto row = row_pointers[y];
    for (unsigned x = 0; x < width; x++) {
      auto rgba = &row[4 * x];
      uint8_t r = rgba[0], g = rgba[1], b = rgba[2], a = rgba[3];
      red.push_back(r);
      green.push_back(g);
      blue.push_back(b);
      alpha.push_back(a);
    }
  }

  // Clean up.
  for (int y = 0; y < height; y++)
    std::free(row_pointers[y]);

  // Write the pixel data into the array.
  Context ctx;
  Array array(ctx, array_path, TILEDB_WRITE);
  Query query(ctx, array);
  query.set_layout(TILEDB_ROW_MAJOR)
      .set_buffer("red", red)
      .set_buffer("green", green)
      .set_buffer("blue", blue)
      .set_buffer("alpha", alpha);
  query.submit();
  query.finalize();
  array.close();
}
Next, we modify the main() function of src/main.cc to call
these functions with command-line arguments that specify the path of the
input .png file and the output TileDB array, and we have a complete
ingestion program:
C++
int main(int argc, char** argv) {
  std::string input_png(argv[1]), array_path(argv[2]);

  // Ingest the .png data to a new TileDB array.
  ingest_png(input_png, array_path);

  return 0;
}
Build and run the program to ingest a .png file:
$ make
$ ./ExampleExe input.png my_array_name
This will read the file input.png, create a new array in the current
directory named my_array_name, and write the pixel data into it.
Slicing image data from the array
To complete the tutorial, we will write a simple function that reads a
“slice” (rectangular region) of image data from the TileDB array created
by the ingestor, converts the sliced data to greyscale, and then writes
the resulting image to a new .png file:
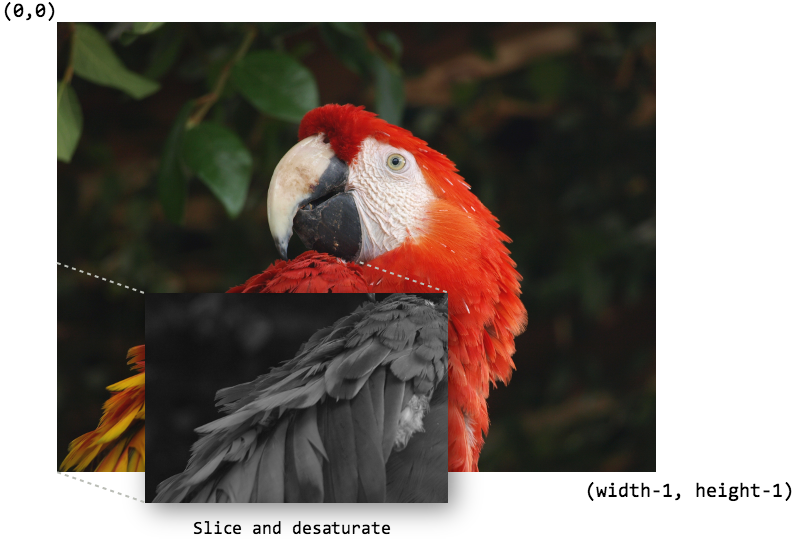
Original image copyright Ben Lunsford, reproduced under CC-BY-SA-3.0-US.
The following code snippet shows the beginning of function
slice_and_desaturate(). First, we must open the array for reading,
and use the utility function non_empty_domain() to calculate the
width and height of the array.
C++
/**
 * Reads a slice of image data from a TileDB array, converts it to greyscale,
 * and writes a new image with the resulting image data.
 *
 * @param array_path Path of array to read from.
 * @param output_png Path of .png image to create.
 */
void slice_and_desaturate(
    const std::string& array_path, const std::string& output_png) {
  Context ctx;
  Array array(ctx, array_path, TILEDB_READ);

  auto non_empty = array.non_empty_domain<unsigned>();
  auto array_y_min = non_empty[0].second.first,
       array_y_max = non_empty[0].second.second,
       array_x_min = non_empty[1].second.first,
       array_x_max = non_empty[1].second.second;
  auto array_height = array_y_max - array_y_min + 1,
       array_width = array_x_max - array_x_min + 1;
Note that the order of dimensions in the vector non_empty is the same
as when we created the array schema (y first to compute the height,
then x for the width). Next, we can use the array width and height to
compute the cell coordinates for the subarray we wish to read. The subarray
selects rows [array_height / 2 : array_height - 1] (inclusive range) and
columns [0 : array_width / 2], which corresponds to the lower-left
quarter of the image:
C++
std::vector<unsigned> subarray = {
    array_height / 2, array_height - 1, 0, array_width / 2};
auto output_height = subarray[1] - subarray[0] + 1,
     output_width = subarray[3] - subarray[2] + 1;
Once we have set up the subarray, we can allocate std::vector buffers that
will hold the image data read from the array, and submit the read query to TileDB:
C++
auto max_elements = array.max_buffer_elements(subarray);
std::vector<uint8_t> red(max_elements["red"].second),
    green(max_elements["green"].second),
    blue(max_elements["blue"].second),
    alpha(max_elements["alpha"].second);

Query query(ctx, array);
query.set_layout(TILEDB_ROW_MAJOR)
    .set_subarray(subarray)
    .set_buffer("red", red)
    .set_buffer("green", green)
    .set_buffer("blue", blue)
    .set_buffer("alpha", alpha);
query.submit();
query.finalize();
array.close();
We now have the image data in memory. We can now transform the pixel data
however we like, and pack it into a buffer that libpng can use to
create the new .png image. Here we are performing a simple desaturation
process by changing the RGB value of each pixel to the average of the color components:
C++
// Allocate a buffer suitable for passing to libpng.
std::vector<uint8_t*> desaturated;
for (unsigned y = 0; y < output_height; y++)
  desaturated.push_back(
      (uint8_t*)std::malloc(output_width * 4 * sizeof(uint8_t)));

// Compute and store the desaturated pixel values.
for (unsigned y = 0; y < output_height; y++) {
  uint8_t* row = desaturated[y];
  for (unsigned x = 0; x < output_width; x++) {
    unsigned i = y * output_width + x;
    auto rgba = &row[4 * x];
    auto grey = (uint8_t)((red[i] + green[i] + blue[i]) / 3.0f);
    rgba[0] = rgba[1] = rgba[2] = grey;
    rgba[3] = alpha[i];
  }
}
Finally we just need to call into libpng to write the image,
and clean up the buffers we allocated:
C++
  // Write the image.
  write_png(desaturated, output_width, output_height, output_png);

  // Clean up.
  for (unsigned i = 0; i < output_height; i++)
    std::free(desaturated[i]);
}
Here is the complete function definition:
Click to see: slice_and_desaturate()
C++
/**
 * Reads a slice of image data from a TileDB array, converts it to greyscale,
 * and writes a new image with the resulting image data.
 *
 * @param array_path Path of array to read from.
 * @param output_png Path of .png image to create.
 */
void slice_and_desaturate(
    const std::string& array_path, const std::string& output_png) {
  Context ctx;
  Array array(ctx, array_path, TILEDB_READ);

  // Get the array non-empty domain, which corresponds to the original image
  // width and height.
  auto non_empty = array.non_empty_domain<unsigned>();
  auto array_height =
           non_empty[0].second.second - non_empty[0].second.first + 1,
       array_width = non_empty[1].second.second - non_empty[1].second.first + 1;

  // Read ("slice") the lower left quarter of the image.
  std::vector<unsigned> subarray = {
      array_height / 2, array_height - 1, 0, array_width / 2};
  auto output_height = subarray[1] - subarray[0] + 1,
       output_width = subarray[3] - subarray[2] + 1;

  // Allocate buffers to read into.
  auto max_elements = array.max_buffer_elements(subarray);
  std::vector<uint8_t> red(max_elements["red"].second),
      green(max_elements["green"].second), blue(max_elements["blue"].second),
      alpha(max_elements["alpha"].second);

  // Read from the array.
  Query query(ctx, array);
  query.set_layout(TILEDB_ROW_MAJOR)
      .set_subarray(subarray)
      .set_buffer("red", red)
      .set_buffer("green", green)
      .set_buffer("blue", blue)
      .set_buffer("alpha", alpha);
  query.submit();
  query.finalize();
  array.close();

  // Allocate a buffer suitable for passing to libpng.
  std::vector<uint8_t*> desaturated;
  for (unsigned y = 0; y < output_height; y++)
    desaturated.push_back(
        (uint8_t*)std::malloc(output_width * 4 * sizeof(uint8_t)));

  // Compute and store the desaturated pixel values.
  for (unsigned y = 0; y < output_height; y++) {
    uint8_t* row = desaturated[y];
    for (unsigned x = 0; x < output_width; x++) {
      unsigned i = y * output_width + x;
      auto rgba = &row[4 * x];
      auto grey = (uint8_t)((red[i] + green[i] + blue[i]) / 3.0f);
      rgba[0] = rgba[1] = rgba[2] = grey;
      rgba[3] = alpha[i];
    }
  }

  // Write the image.
  write_png(desaturated, output_width, output_height, output_png);

  // Clean up.
  for (unsigned i = 0; i < output_height; i++)
    std::free(desaturated[i]);
}
Modify the main() function to take a third argument for the name of the
output image to create, and invoke the slice_and_desaturate() function:
C++
int main(int argc, char** argv) {
  std::string input_png(argv[1]), array_path(argv[2]), output_png(argv[3]);

  // Ingest the .png data to a new TileDB array.
  ingest_png(input_png, array_path);

  // Read a slice from the array and write it to a new .png image.
  slice_and_desaturate(array_path, output_png);

  return 0;
}
Now build and run the example, removing the ingested array from previous steps (if it exists):
$ make
$ rm -r my_array_name
$ ./ExampleExe input.png my_array_name output.png
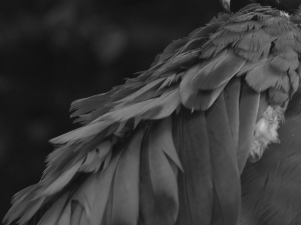
This will create output.png in the current directory containing the sliced, desaturated image: